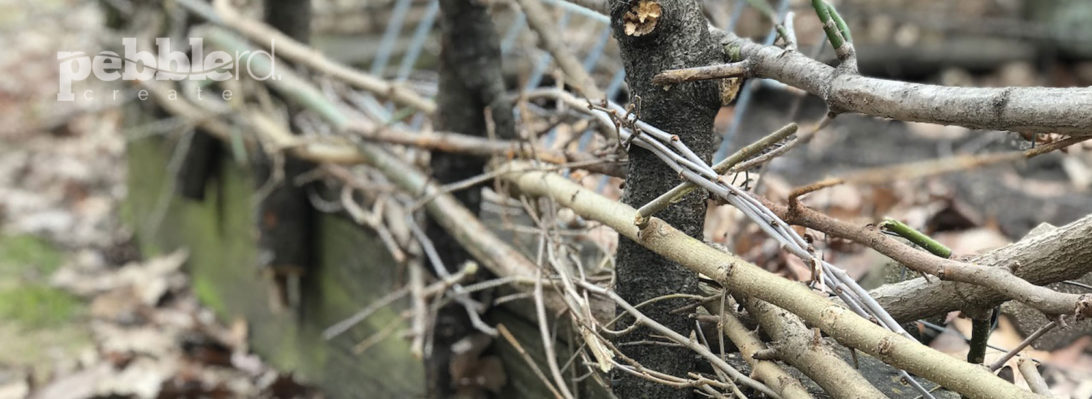
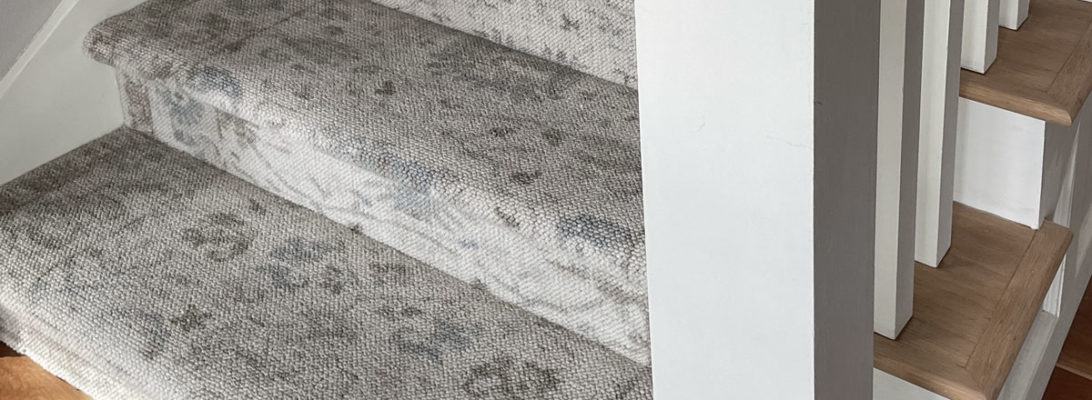
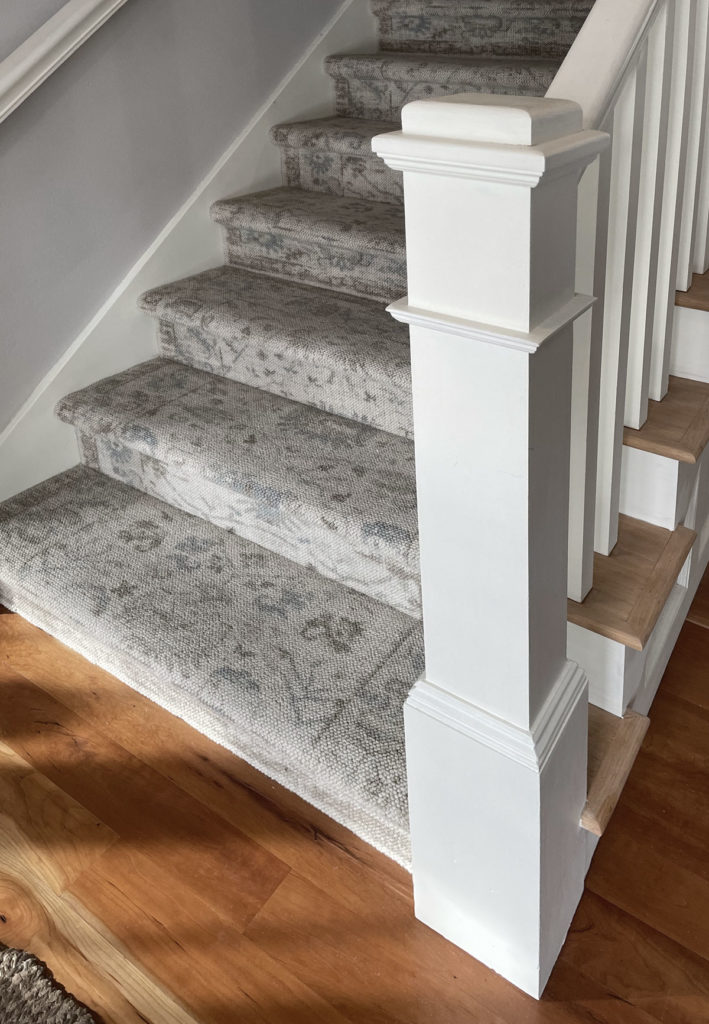
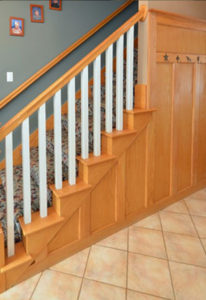
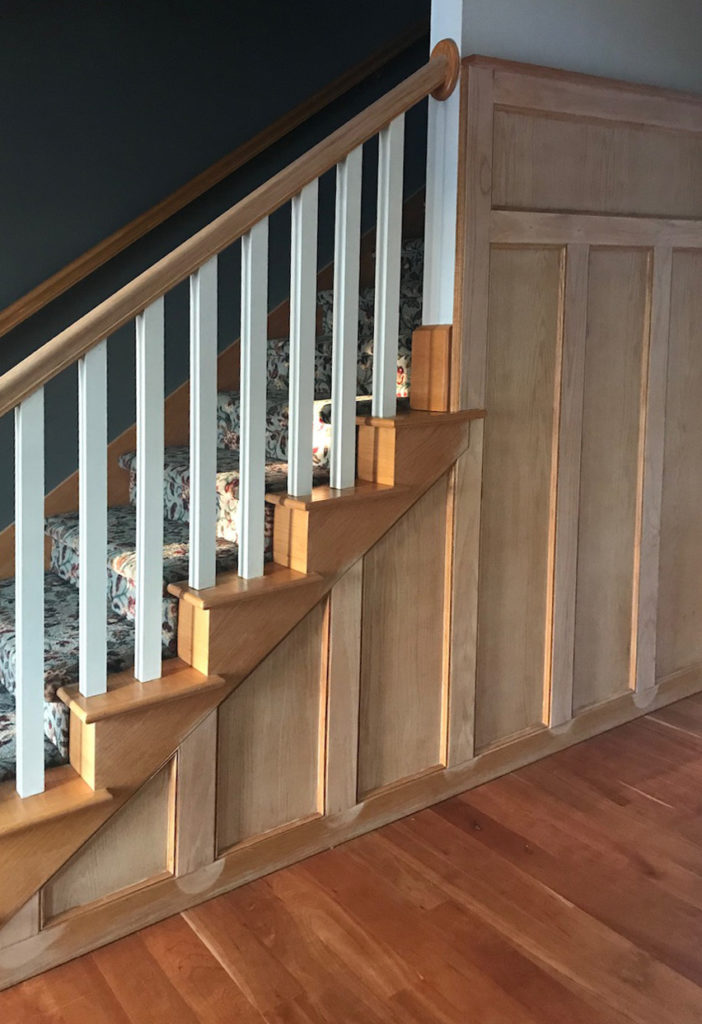
I finished all the sanding and painting of the hall and stairs. In my previous post, I describe how I painted over the 90’s gold oak. I really struggled with this. What kind of carpet do you put on the stairs?
I loved the idea of a natural jute or sisal, but my stairs needed something with pattern and I’m not sure how natural fiber would look in a few years. There aren’t hardwoods covering every step, so a 24″ runner was out of the question. I looked at dozens of carpet samples, but they were all so plain. I don’t think carpet patterns have been updated in twenty years!
Then, miracle of all miracles, I found a rug that was just the right width at Pottery Barn. The Dovie Persian-Style Rug came in the right width and actually cost less than carpet!
My daughter was craving shishito peppers. She wanted to drive 40 minutes to the nearest Trader Joe’s to get some. But I wouldn’t go. There is a pandemic! My small-town grocery store feels much safer, especially at 6am.
And what happens a week after she moves out of state? My small-town grocery store has shishito peppers.
I understood her simple recipe of blistering the peppers in olive oil and sprinkling with salt, but it just didn’t fit into the meal schedule. I was craving soup and could it have anything to do with the -9 windchill weather we are having? Yes – that is a negative sign before the 9.
Naturally, I googled to find a recipe, but found nothing. So here it is. Delicious – and completely made up by me.
10shishito pepperswash; cut off stems; cut into .5" pieces
8ozfresh raw mushroomsslice
1shallot diced
2tbspbutter
2 tbspflour
4 cups whole milk
1tbspthyme
2tspL.B. Jamison's chicken flavored soup base
salt and pepper to taste
Instructions
Heat olive oil in stock pot. Blister pepper slices and sprinkle with salt. Remove peppers from pan.Add the butter to the pan and sauté mushrooms and shallots for five minutes. Stir in flour to coat the mushrooms, then slowly add milk while stirring. Add thyme, bullion, and blistered peppers. Cook on medium and stir until there is a low boil and broth has thickened. That's it. So easy and so good.
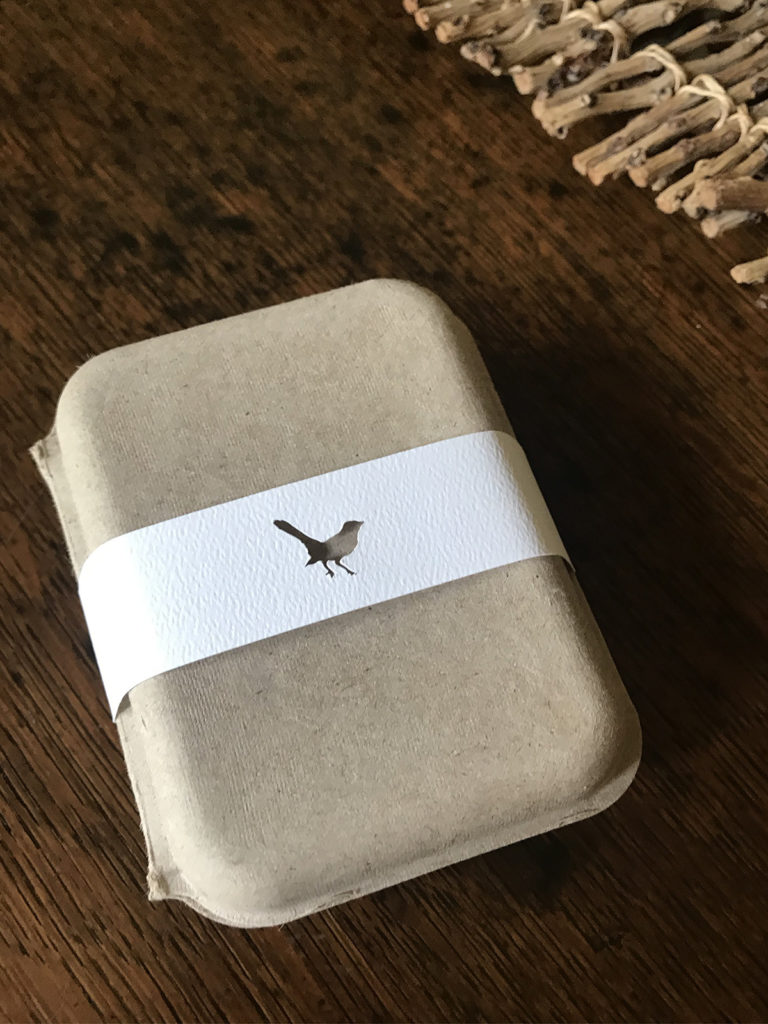
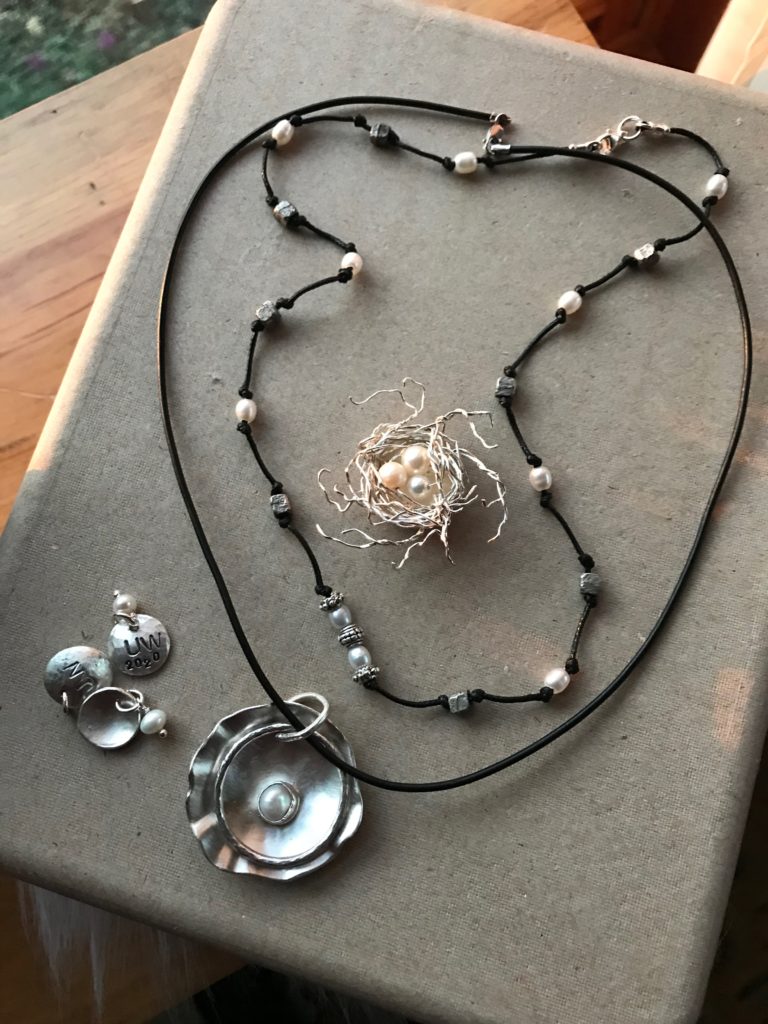
Since covid started and my work died for a few months, I had all the time I needed to work on my jewelry logo, website, and packaging.
I’ve been a graphic designer for over 20 years. It’s so much about finding balance : what does the client want and what do I like? What do I want to create and what is the budget? How much time could I spend on a project and when is the deadline?
With catbird creek being my very own project, I have freedom to design whatever I want. Due to covid, I have all the time in the world. My budget was somewhat limited, but I sort of love that part. How do I make something I like that is affordable. Also important to me… is it earth friendly?
Let’s start with the logo. True confessions… Tim and I enjoy creative thinking over a couple beers and pretzels. Like the scene from MadMen, all you need is a napkin and a pen to start writing down ideas. This is how we came up with Pebble Road, Lake Street Book Keep, and Catbird Creek.
This is the first year we discovered a catbird in the back yard. I always wanted to create a logo with a bird in it. And when I think of Peopple Road–the actual spelling of the road I grew up on–I think of the creek where I spent hours playing as a kid. There was a barbed wire fence at the entrance to the creek. Purple has always been my favorite color. And there it is. A logo is born. Forget the pressure of designing a logo for a client and making it meaningful and readable and clean and perfect. That’s not me. This is me.
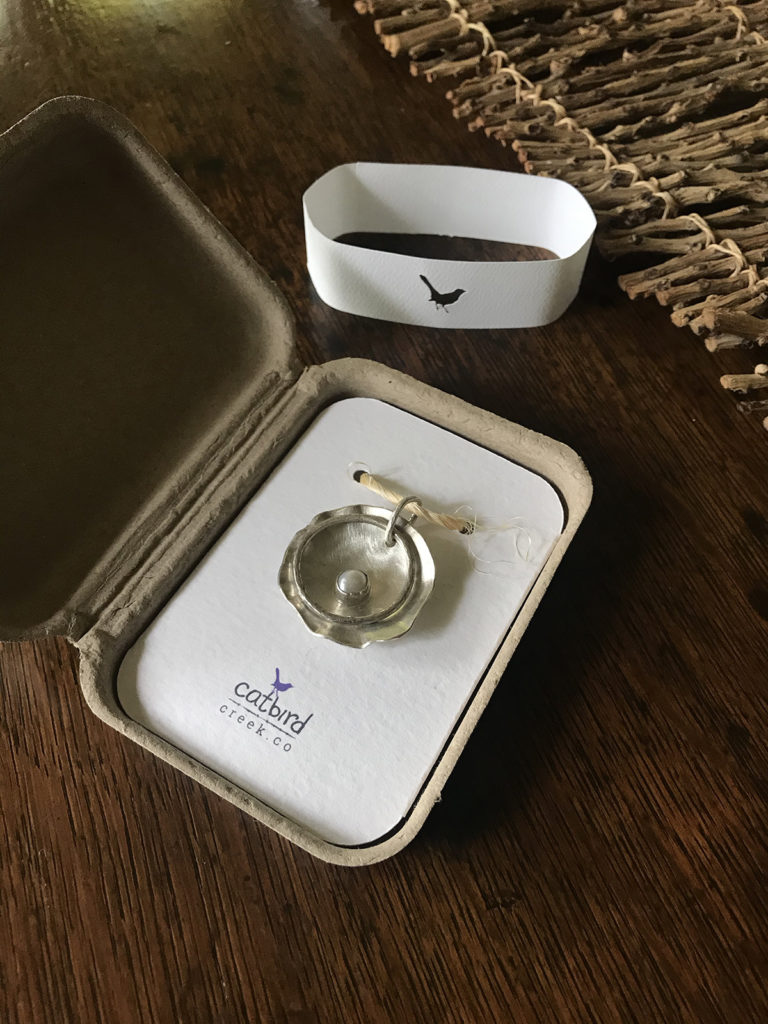
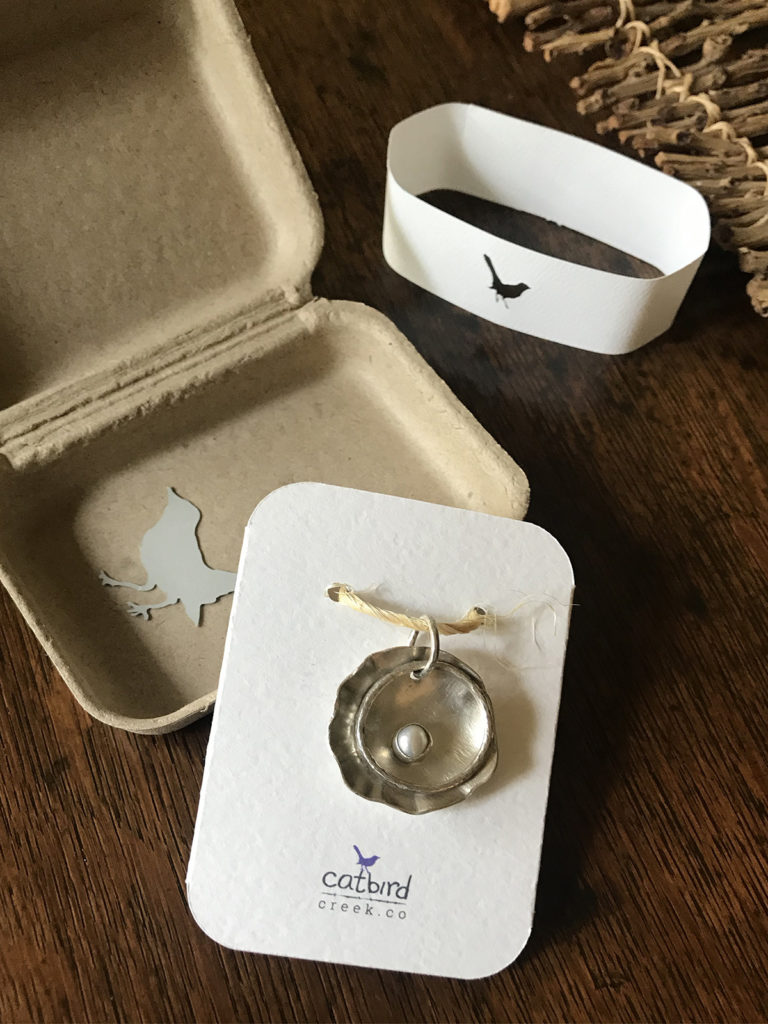
I’ve created these pieces of jewelry. It’s just a hobby– just fun. I really like hammering the metal. And i’ve really found my niche. Like my hand drawn bird and “catbird”, my style in jewelry is rough, hammered, organic, natural. I realized after selling my first piece that I needed packaging to go with it.
This was really fun. I wanted earth friendly packaging so I started with a simple recycled box from Eco-Friendly Packaging. The bird is a perfect icon to cut out of the strip of paper. Purchasing a Cricut to cut that bird was not in the budget, but I’m convinced that I will use the Cricut for other things.
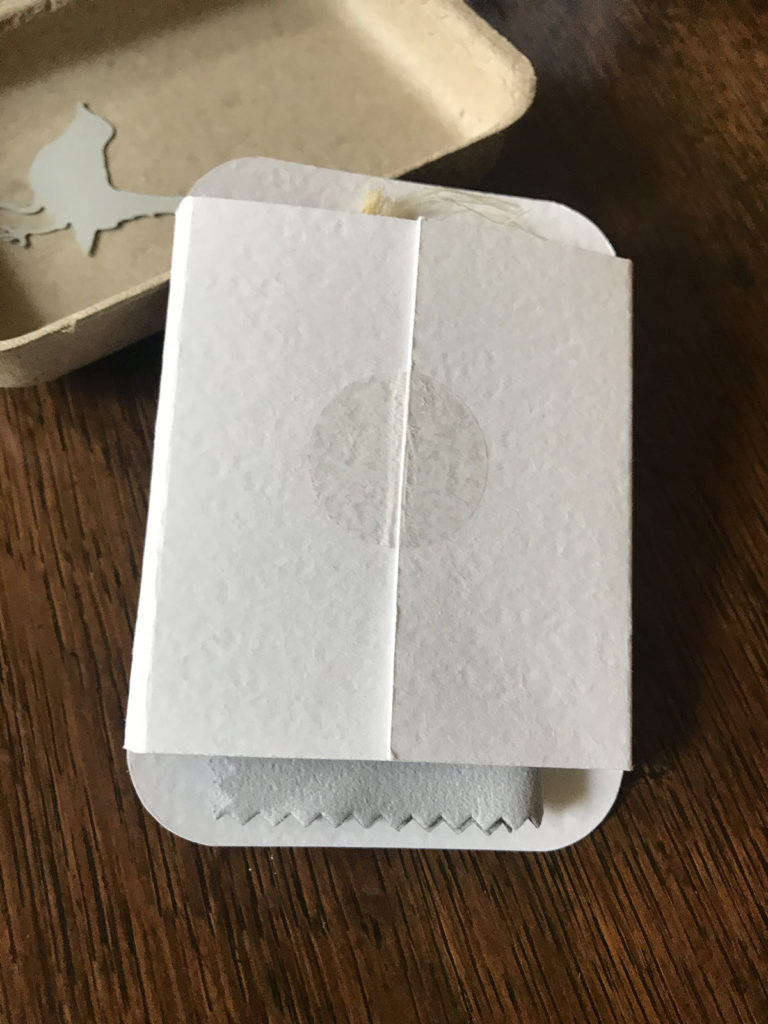
I then created a card to hold the jewelry. The cricut allowed me to die cut a piece of card stock exactly as I needed it, with two holes for the twine, scores for the folds and rounded corners to fit in the box. With this design, I can tuck the polishing cloth inside the card.
Being a graphic designer, I believe paper matters. When developing my brand for Pebble Road, I found Neenah Paper’s Canaletto. It has a great texture, 20% cotton for a soft feel, and comes in all the thicknesses I need.
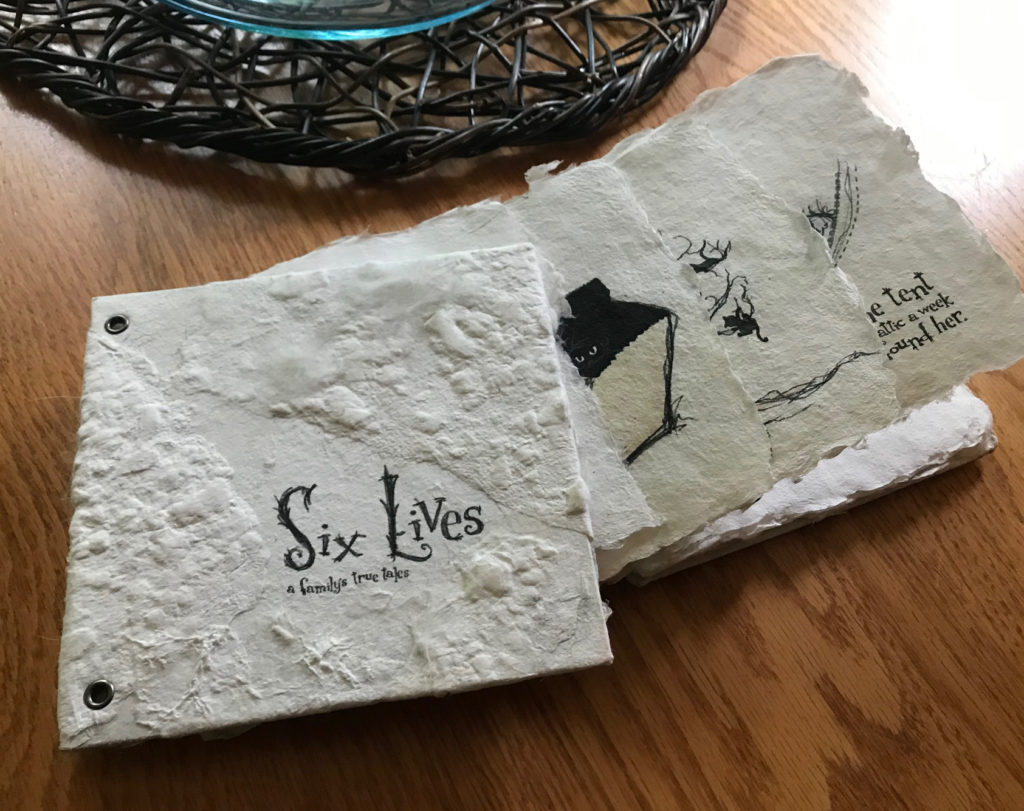
I first made paper when I was going to grad school at uw-madison. I was working on my masters in graphic design and I wanted to have some fun, so I took book making. It was fun! I won’t kid you, being an art major is too good to be true and so is being a graphic designer. I have absolutely loved my career. Back to paper making.
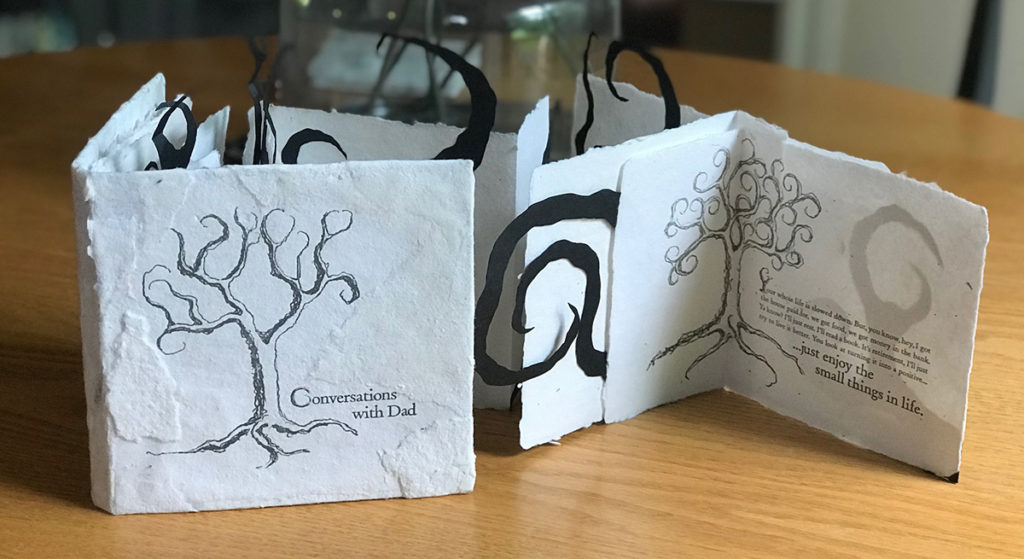
This book was about how my cats died when I was growing up. Have you heard of seed paper? You can mix seeds with the pulp and when your are done with the paper, plant it. Well… it only makes sense to put cat fur in the paper used to make a book about cats, doesn’t it? see moreBefore my Dad died, I interviewed him about his life. Each page of this book had quotes from the interview. I illustrated seven trees to represent each person in my family and illustrated the initial caps to match the trees. The pages of the book are held together with tree branches. see more
Part of the bookmaking class was actually making the paper for the books. We learned about different binding methods, printing, etc. The classroom for paper making was amazing. It had two pulping machines–large containers with sort of a lazy river and grinding system. We brought in used fabric made of 100% cotton and cut them into 2″ scraps. I went to the local resale shop and picked up some sheets, t-shirts and tablecloths. The scraps of fabric flowed around the lazy river, and at one point, funneled through grinders. Over the course of a few hours, the fabric turned into pulp–a mush of cotton.
The classroom also had large sinks, drains in the floor, huge buckets, screens large and small, drying racks and a hydraulic press to squeeze water out of the paper. I don’t have any of that at home, but paper making is still fun.
You’ll need a few things. The screen is essential. A bin can be used to screen the pages. If you buy a kit, it may come with a sheet of felt-like material. That’s fine, but I recommend finding an old wool blanket and cutting it into squares slightly larger than your screen. I found my old army blanket at the local resale shop. Wool is key. When you peel off the screen, you want the pulp to stick to the wool.
Basically, as the video shows, have a bucket of pulp and another container to screen the pulp. If you are looking for consistency, start with enough pulp to create the desired thickness and then add consistent amounts back in after making each sheet to maintain that thickness.
The pulp can be bought ready to go. Just ad water and depending on the quality, you probably want to soak in water overnight to make sure it’s loose. For the brown pulp, I used some packaging. It looked similar to egg carton material. I tore it into 2 inch squares and soaked it overnight. By the next morning it was broken down into mush. I ran my mixer through it to break up any chunks.
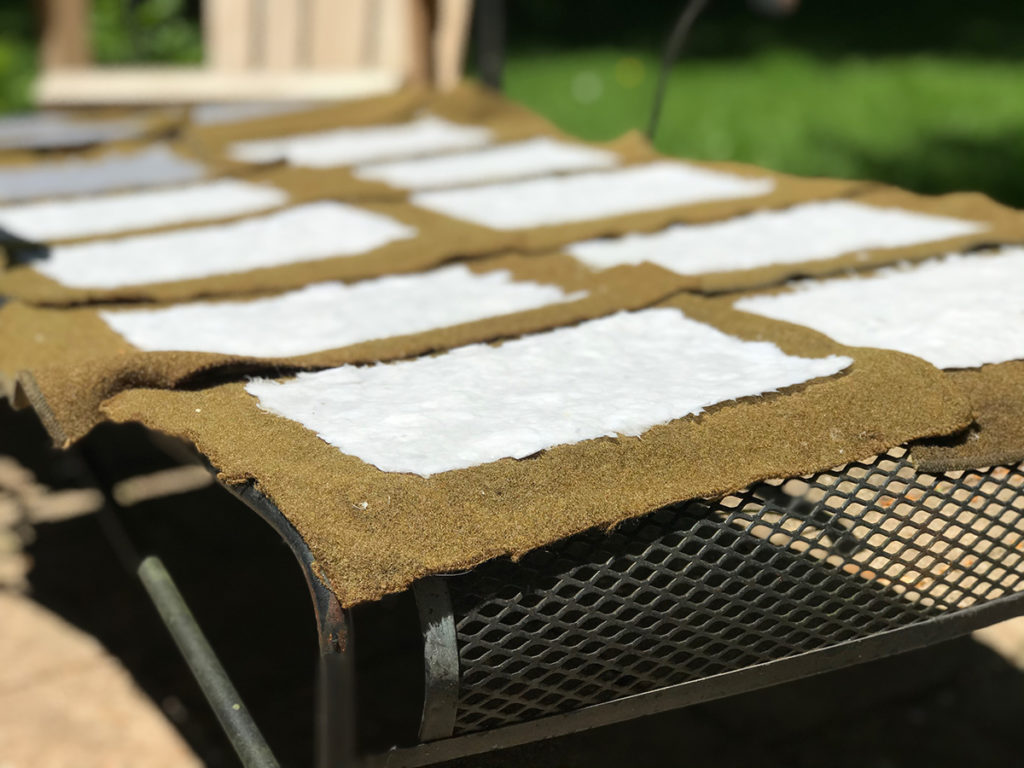
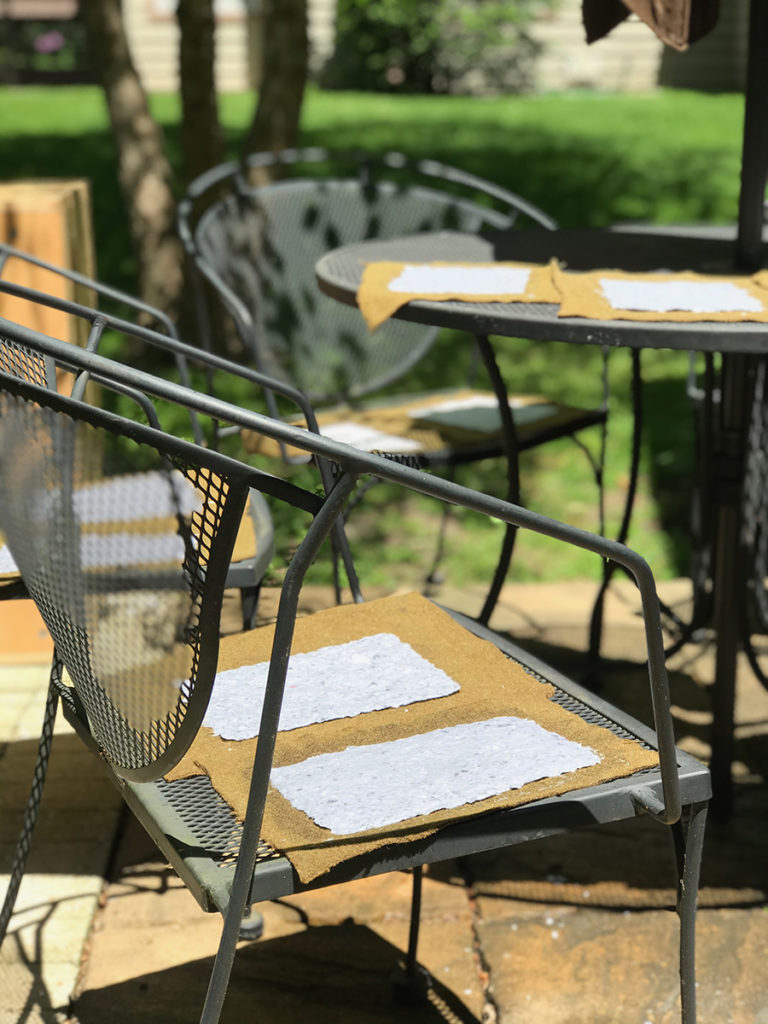
Leave the sheets of paper on the wool until completely dry. They may curl up if you them off early. The lawn chairs and table provided a great place to work. The screen on the table allowed the water to drip down and screen on the chairs made for fast drying.
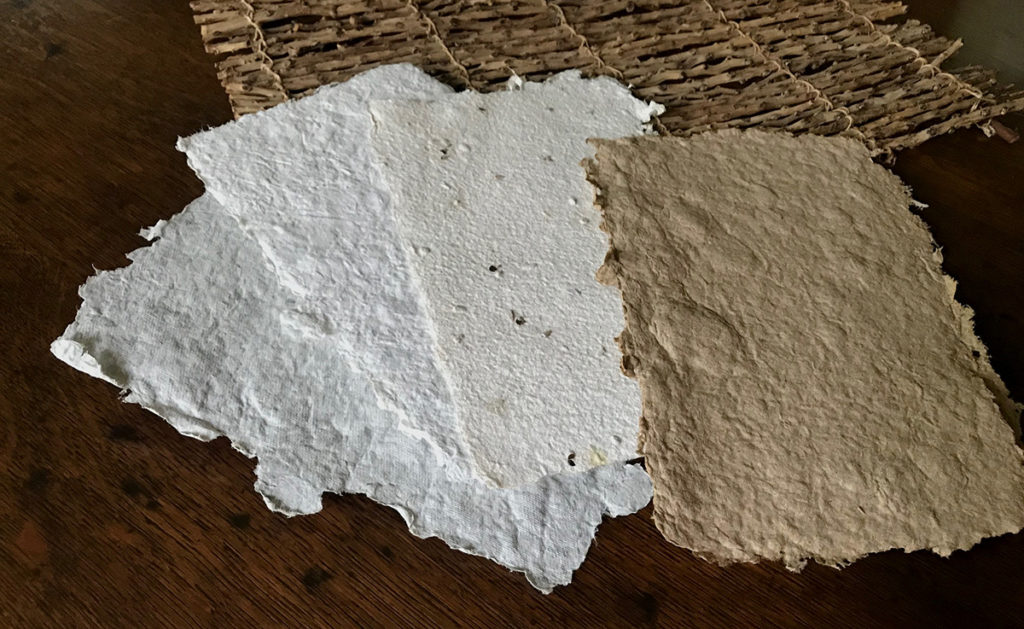
It may take more than a day of drying. After a day of drying outside, the paper and blankets were dry enough to bring in the house and layout on a table. At that stage, you can also stack several sheets and flatten with a book and some weight.from left to right, the first three are 100% recycled cotton. The third piece has seeds in it. The fourth is recycled packaging.
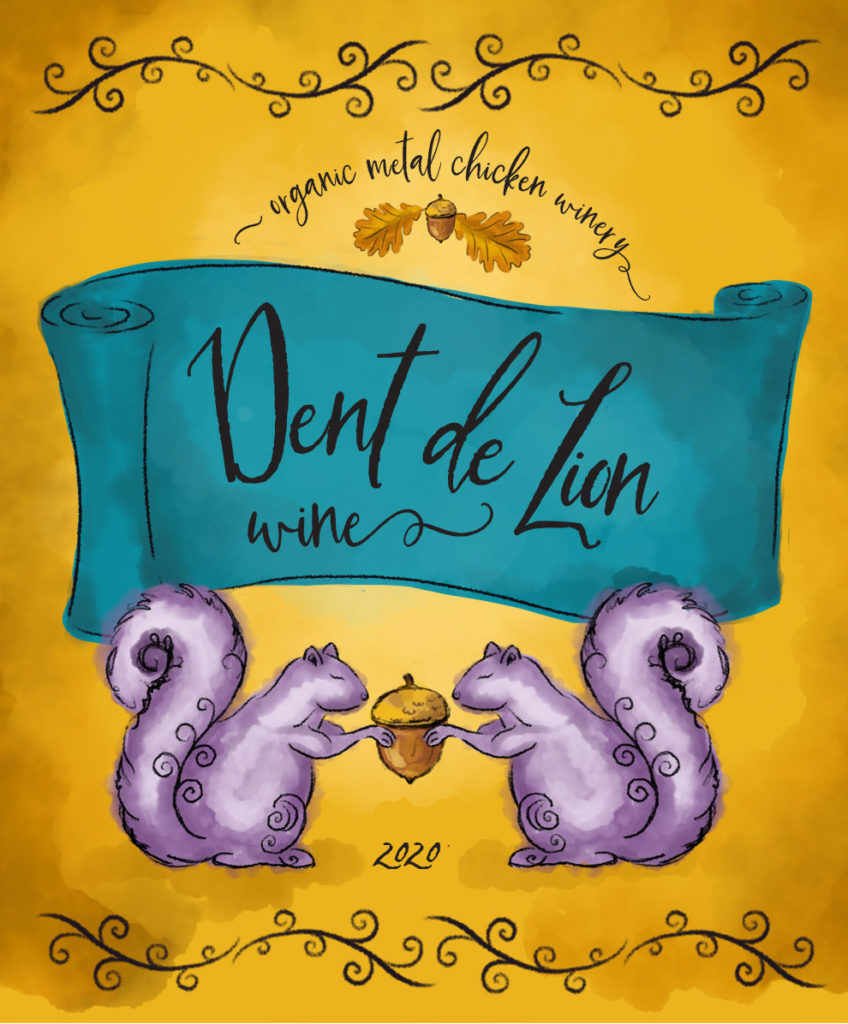
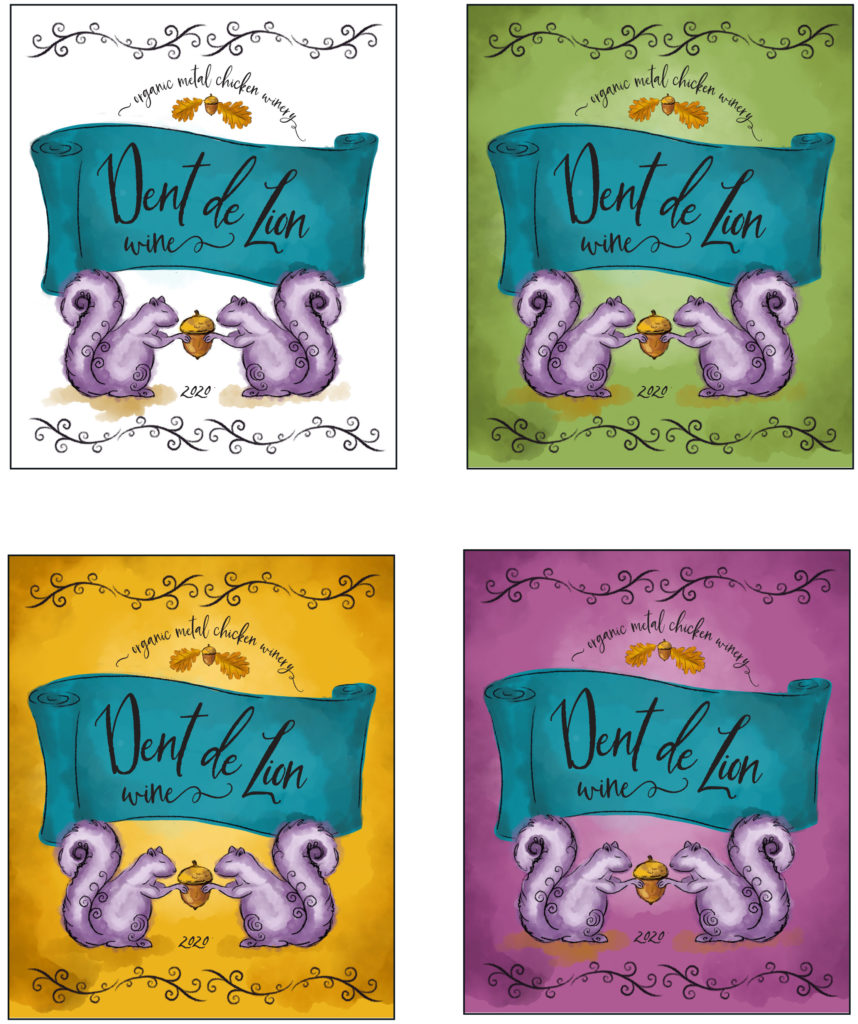
I’ve always wanted to design a wine label. I’m so glad my friend had this creative idea for me to illustrate. In the end, she chose the white background to go on the clear/yellow bottles.
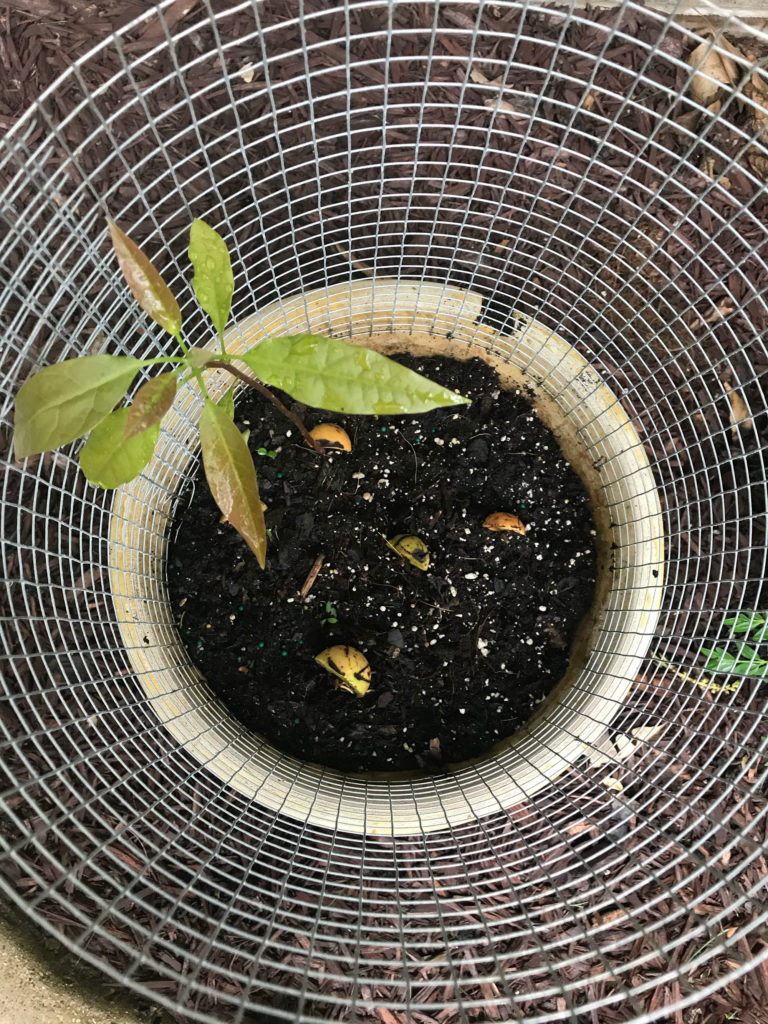
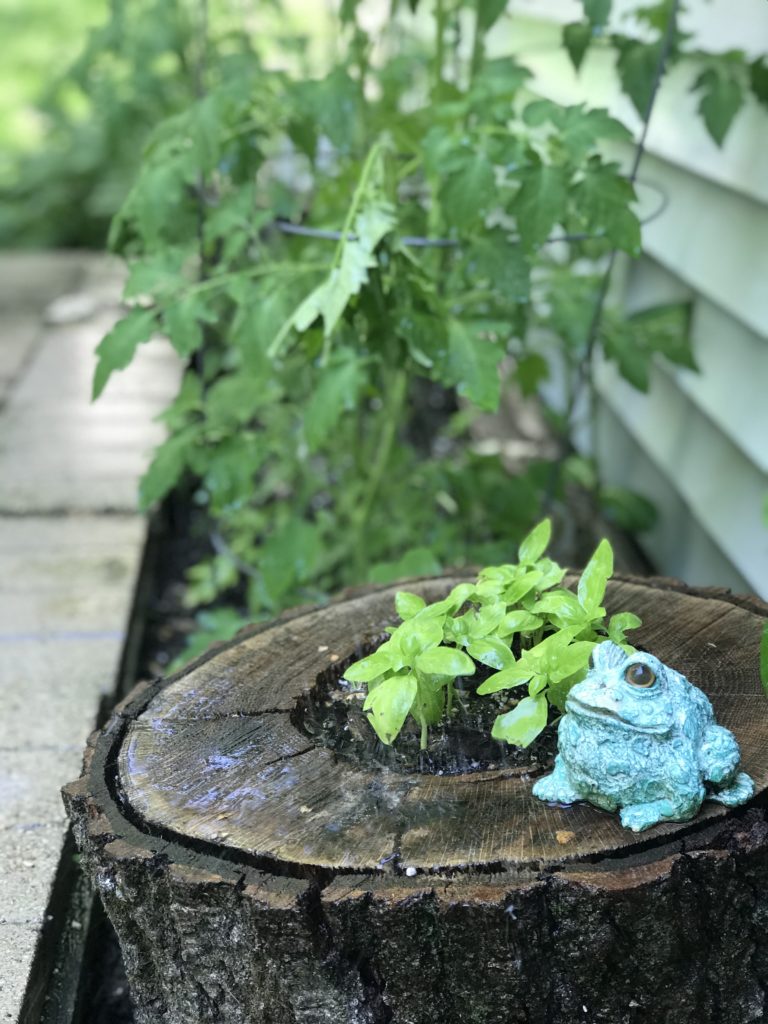
I waited and waited for the avocado to sprout. I had all but given up when I stuck the pits in a pot of soil. A few weeks later, I have a ten-inch sprout and three more pits just starting to sprout. original growing postThe new planting area is doing great. I have a couple tomatoes on the vine. original post
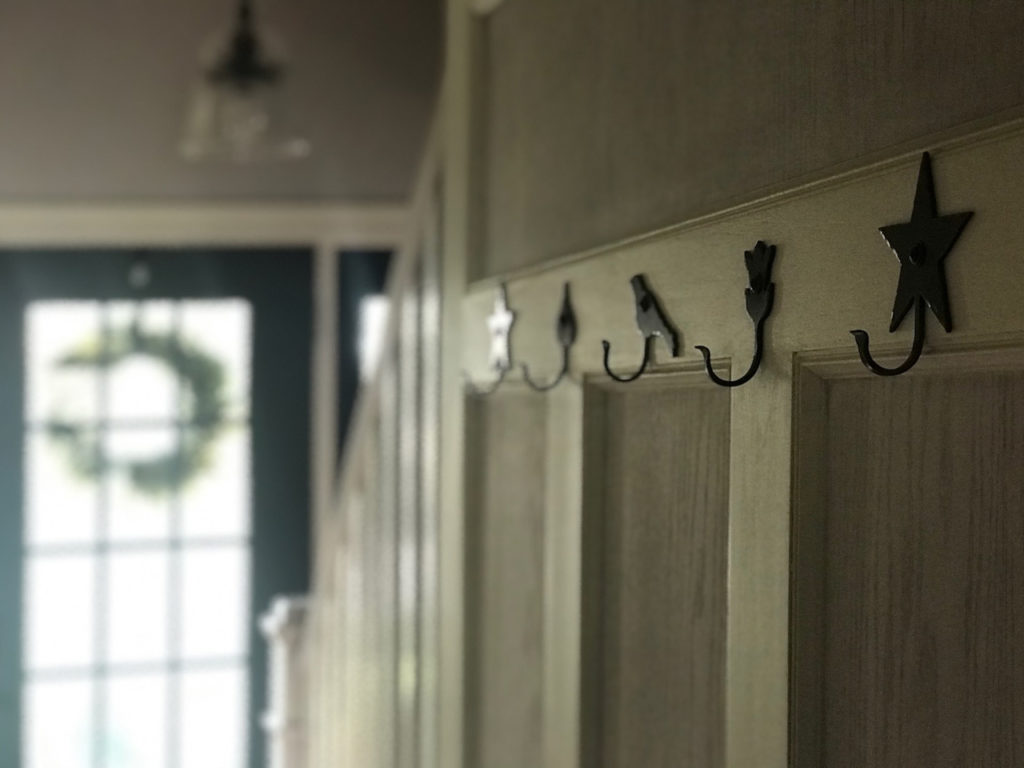
My old house had tons of woodwork that I never would have painted. Big thick baseboards, doors, pocket doors, and a pantry all had original stain and aging. But what about a newer house with wood from the 90’s?
I felt like it was dated.
The tile was replaced with cherry shortly after we moved in. I didn’t feel like the oak, no matter how I stained it, would look good next to the cherry. And I’ve always loved white painted wood. Still feeling guilty about painted the wood, I decided to meet half way and stain the wood white.
I screened off the hallway with plastic sheeting to contain the dust and used a rotary sander for most of it. Stripper did not seem like an option. I know myself well enough that I would not be able to keep the stripper off the nicely finished floors. I protected the floors with an old rug while sanding.
sanding
Between the rotary sander and the corner sander shown below, it only took about four hours to sand.
It took me a while to decide if all of it should be stained or just part of it. I started with a thin mixture of paint, plaster of paris and water. I worked in layers until I was happy with the color. The first few coats left a pinkish hue. 3-4 coats made it white, and the wood grain shows through as I wanted. The main boards were painted solid white. It was still a chalk paint mixture, but less water. Two coats of paint and several coats of Minwax Paste Finishing Wax should hold up to the traffic of the entryway.
This job isn’t done yet! We are still debating: do we replace the steps with cherry? Or sand the oak stairs and replace carpeting?
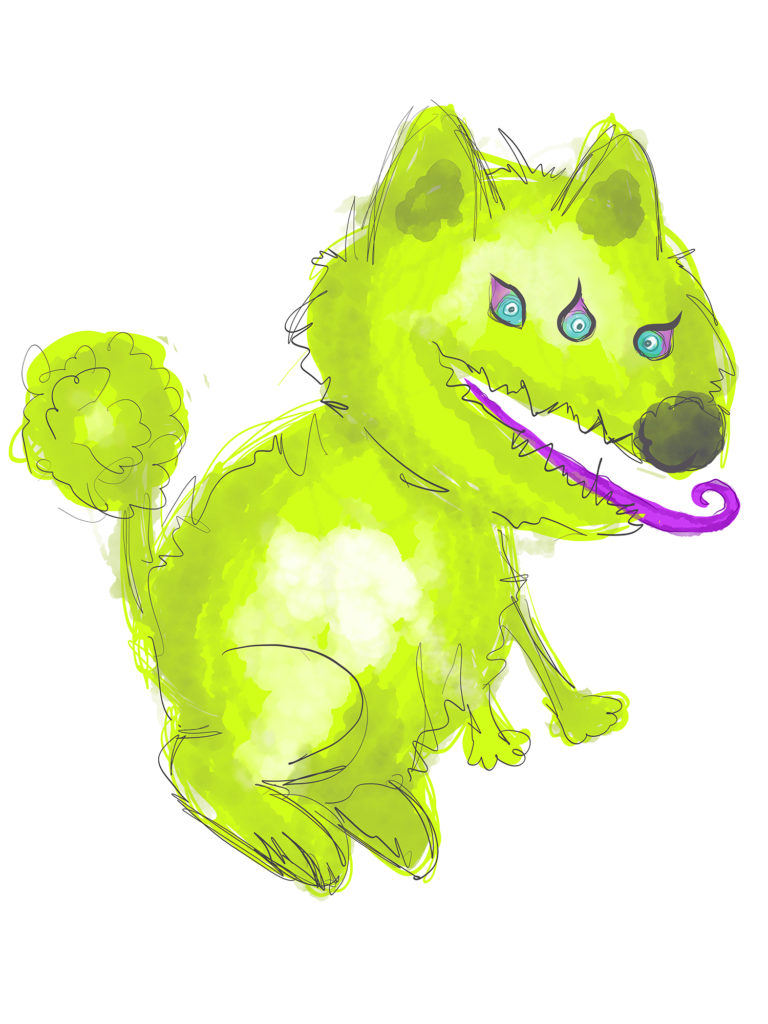
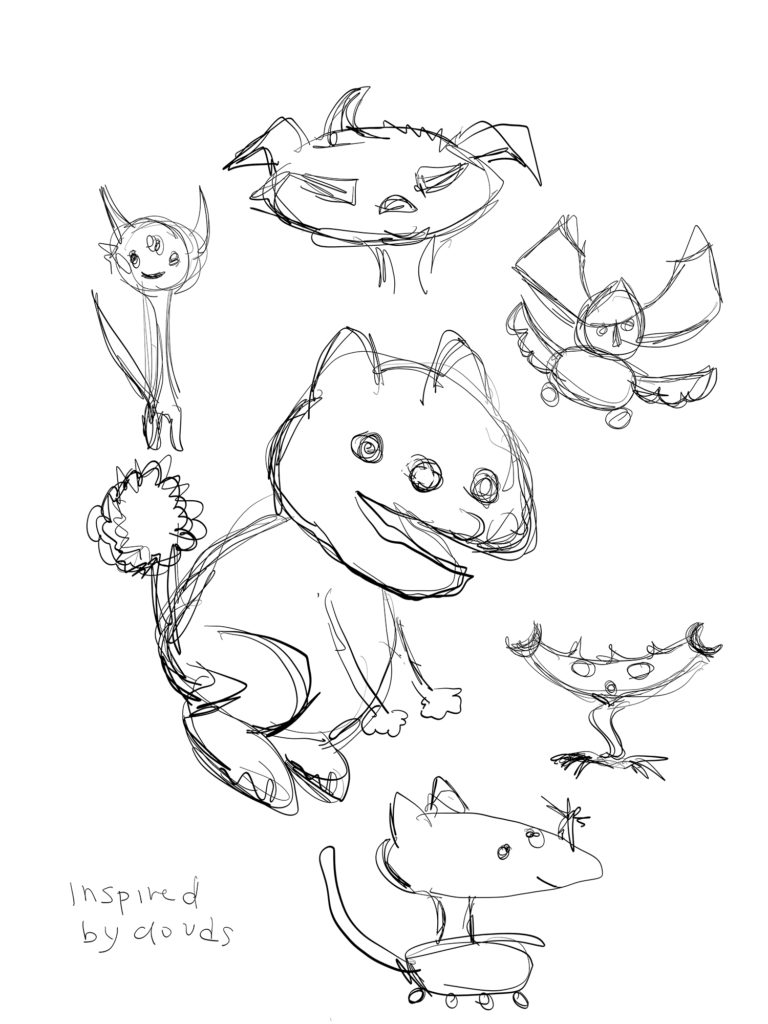
staring at the clouds – yes, that is so like me – i saw a figure. and it inspired me to do some doodling. initial drawings are in black and white. coloring them all is a source of endless entertainment waiting for me.